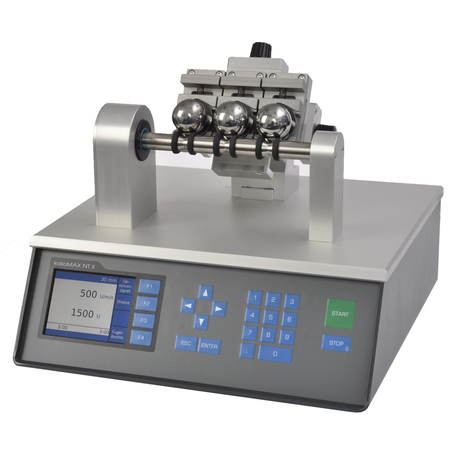

- Fast and easy layer thickness measurement
- Measurement of layer thicknesses and layer systems
- Easy to operate
- Precise measurement without calibration
- Determination of wear coefficients
- Up to 3 samples in one grinding process
For a wide variety of samples, coating thickness measurements with calo testers has been an established method for many years. A hardened steel ball moistened with an abrasive slurry is set in motion by the motor-driven shaft, which grinds a spherical cap in the sample – the so-called calotte. If the coating is ground completely through, each individual layer can be identified under the microscope as a concentric ring (flat sample) or ellipse (cylindrical sample). By determining the diameters (flat sample) or the long diagonals (cylindrical sample), all layer thicknesses can be calculated with the evaluation software kaloSOFT. The geometric measurement provides results with high accuracy for coatings in the μm range.
The wear resistance can be determined if the top layer is only abraded.


| Range of application: | |
| Layer thicknesses | approx. 0.3 – 50 μm |
| Diameter of the spherical cap | approx. 0.1 – 3 mm |
| Measurement accuracy | 1 – 5 % (dependent on surface roughness) |
| Characteristics: | |
| Ball diameter | 15 – 40 mm |
| Clamping range for samples | Rectangular disc: 14 – 28 mm |
| Round disc: 15 – 34 mm | |
| Shaft: Ø 13 – 25 mm | |
| (other dimensions on request) | |
| Cross table travel | 25 x 25 mm |
| Incline of sample level | 60 degrees |
| Color display | 480 x 640 Pixel |
| Revolution speed | 50-1000 1/min |
| Running periods | arbitrary |
| Input voltage range | 85 – 264 VAC |
| Input frequency range | 47 – 63 Hz |
| Dimensions | 300 x 295 x 235 mm (w / d / h) |
| Weight | approx. 8 kg |
- Calotester kaloMAX NT II S3 with detachable cross table
- Power supply
- Manual
- Grinding paste of various granulation
- Various microscopes equipped with high resolution cameras
- evaluation software kaloSOFT


